They Hissed, They Buzzed, and Then One Died
I own a pair of KRK Rokit “Studio” Monitors. If you know anything about the studio audio world, you’ll know they’re very entry level, and I got them ages ago for cheap when I believed that producing electronic music would be a ton of fun as a hobby. It was, and then it wasn’t. Since then, they’ve been my general desktop speakers. Each speaker has a woofer, a tweeter, and an integrated amplifier. I knew something was up when less than a year after I purchased them as they both developed a distinct hiss when not receiving signal. This I could tolerate, however the left speaker started to fade in volume some time ago, and it finally stopped making sound. You’d think I would fix or replace a speaker, but it would warm up after a while, and sometimes work. Intermittent problems being intermittent tend to make me say to myself, “I can fix that.”, but if I ever get around to it is another thing entirely.
My issue essentially came down to the “black gunk” problem, a known manufacturing defect where a black potting compound, likely used to keep the vibrations of the speakers from causing buzzing or wear to some of the board components, breaks down over time. The potting compound absorbs or releases moisture and causes corrosion on the parts. Oh, and did I mention it’s conductive at this point? My left power amp had a significant amount of this goop all over, in particular around a bulging capacitor which was also easy to visually diagnose. I suspect the early failure of the capacitor was in part due to this broken-down compound. I spent a good amount of time with dental pics, alcohol, swabs, and a little soldering and fixed the thing, minus the LED power light on the front, which I wrote off as an acceptable loss of function to an otherwise good repair. I put together a quick break down and repair in the pictures below, but if you’d like more detailed coverage, and video you can read all about the “Black Gunk Problem Widespread with KRK Rokits” on Reddit.
Step by Step Repair
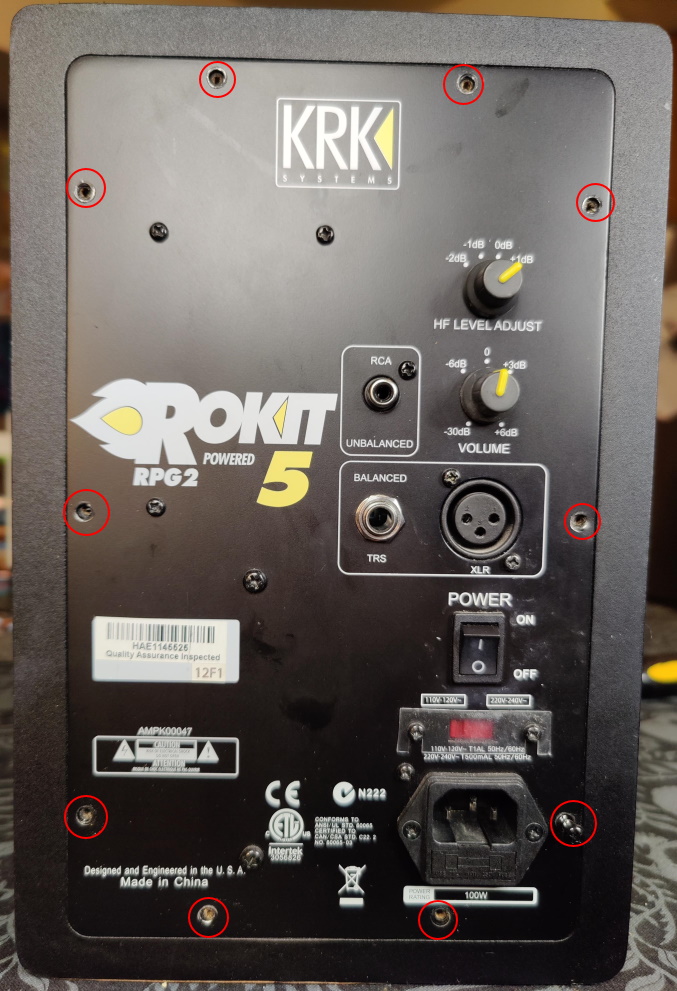
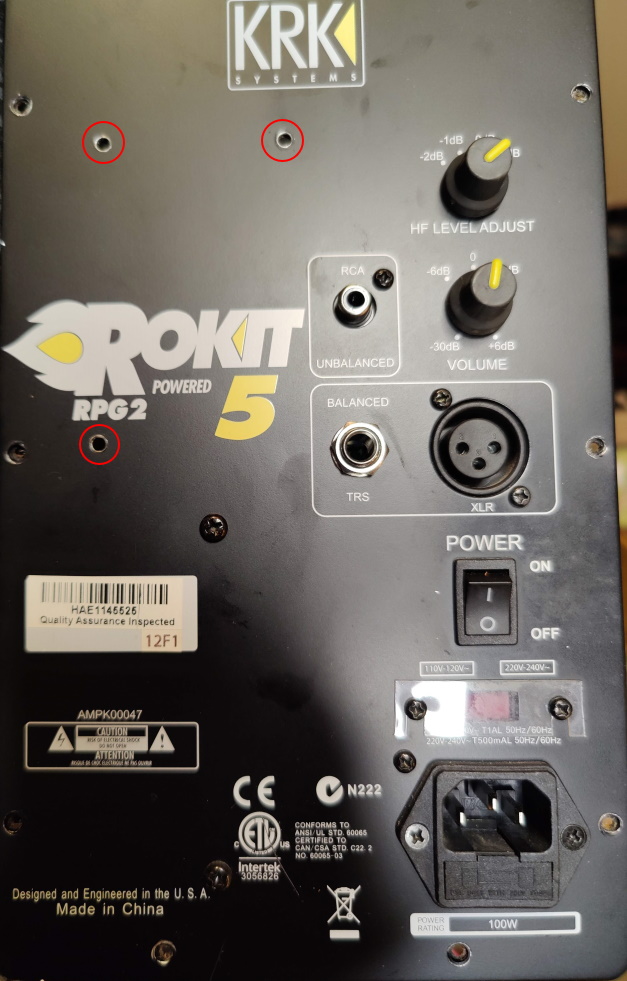
With a Phillips head screwdriver remove the ten screws indicated below on the rear panel and set aside.
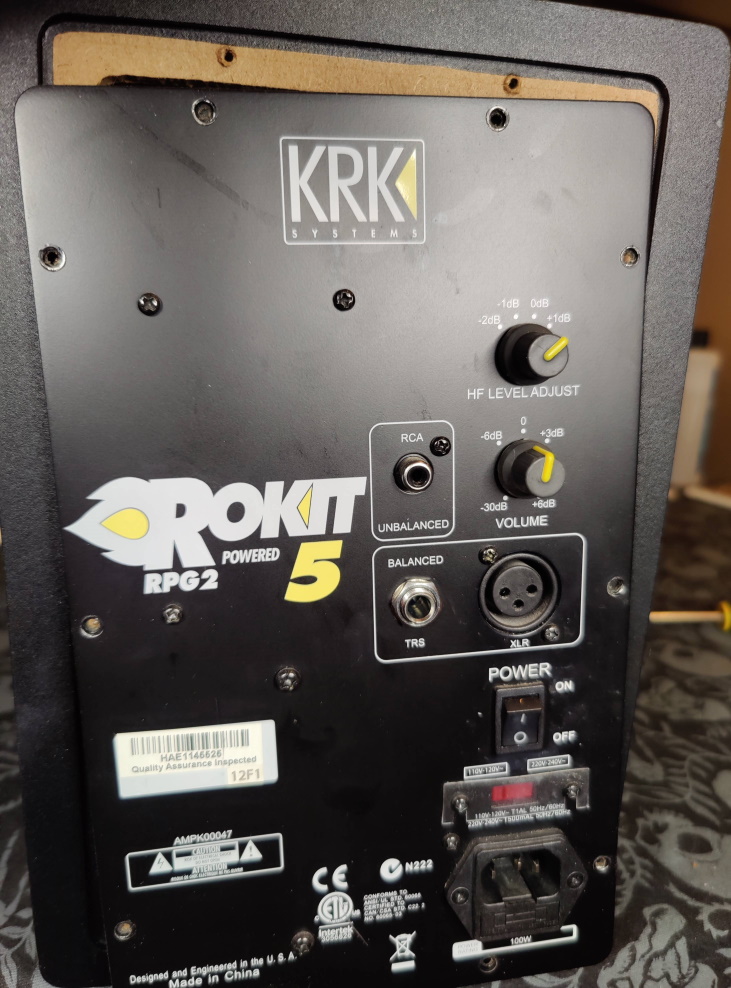
The rear panel has to then be pried off. I used a wide putty knife with a beveled edge. I think a flathead screwdriver would work fine, but you might end up marring the cabinet.
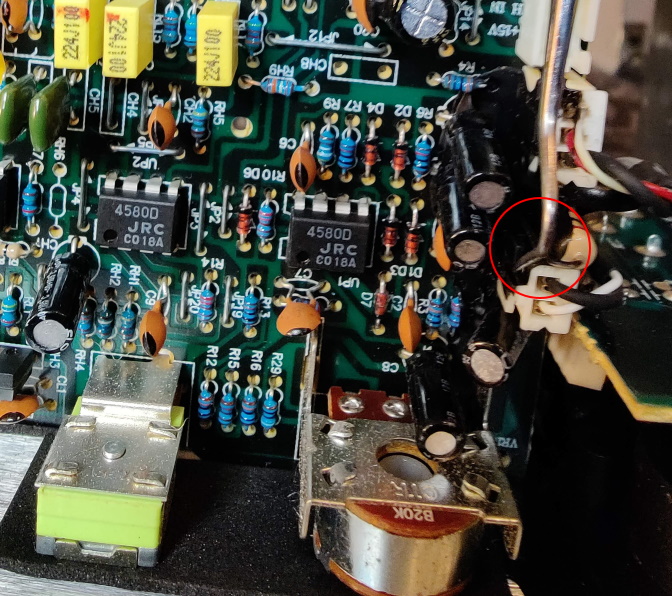
Pull the back panel off carefully. It will be connected to various wires inside the unit. We’ll be disconnecting those starting with this connector that goes from the power supply to the power amp. You’ll also want to disconnect the two wire connector next to it that powers the front LED. Be really careful with this one. I think I damaged it on my other monitor and the LED no longer lights up. If it was anything else I would have fixed it.
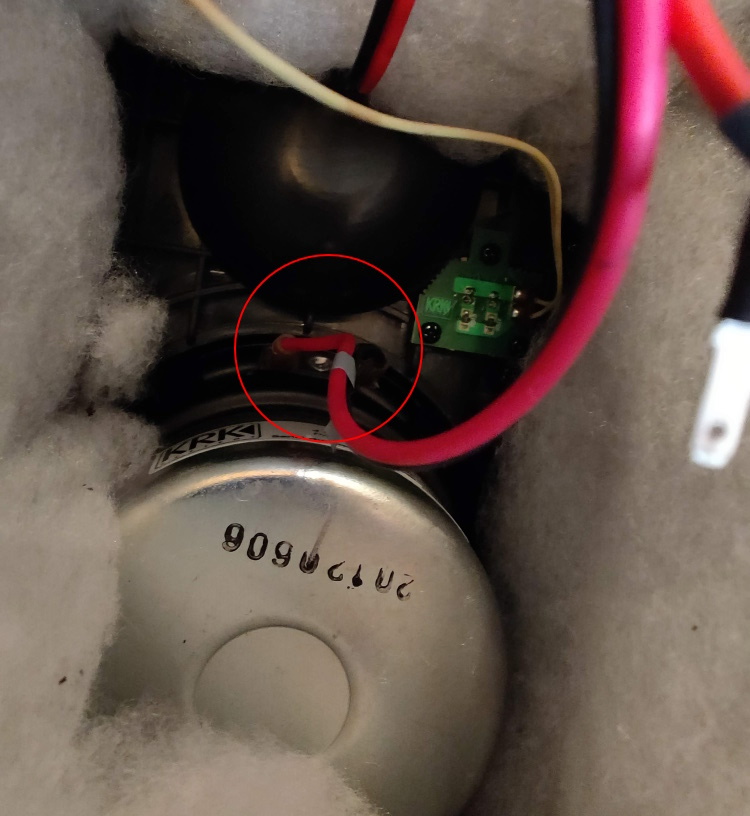
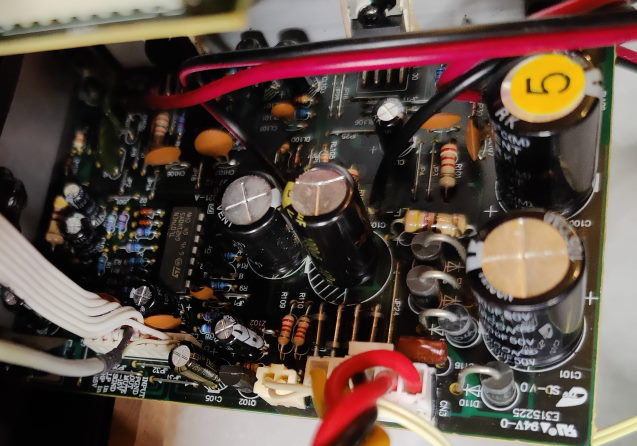
These leads that head to the tweeter need to be pulled apart with two hands.
The woofer can be easily disconnected by reaching into the cabinet, and slipping off these connectors. Be mindful of the wire orientation for when you reconnect them.
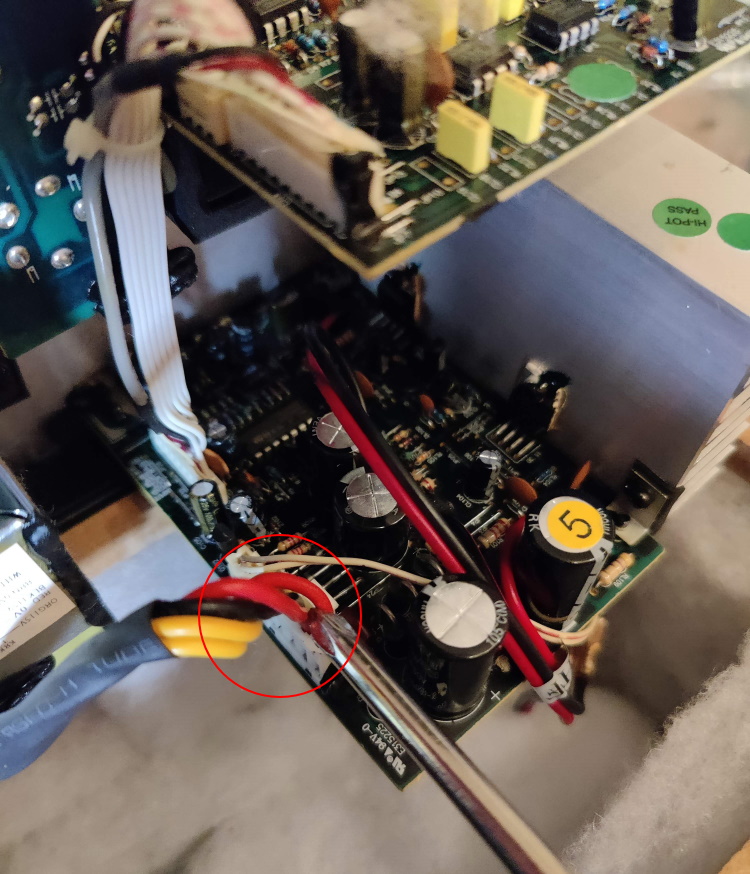
You’ll need to clip this zip tie in order to decouple the two boards. There is going to be no fixing the amp without further disassembly.
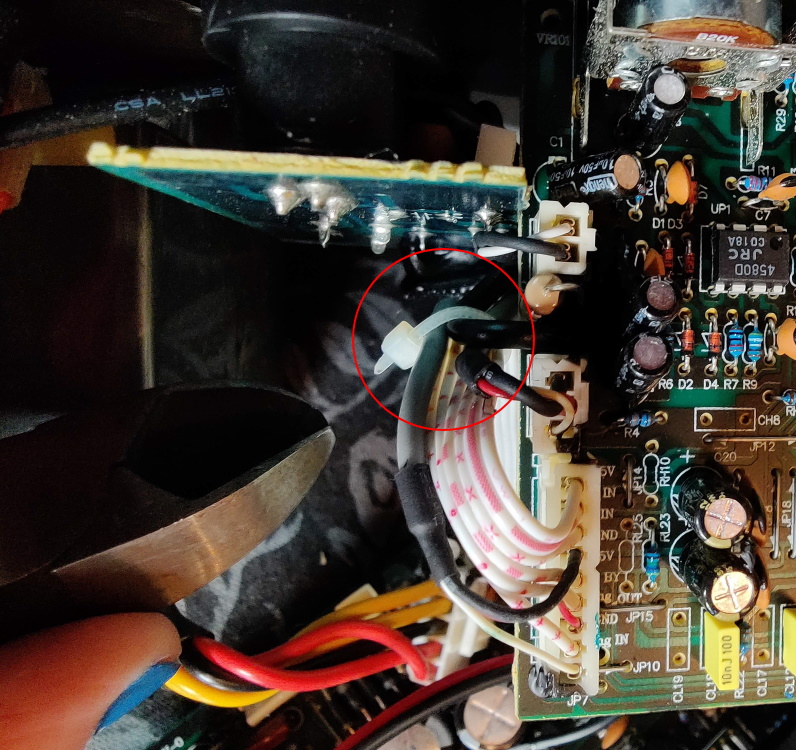
Once you’ve clipped that zip tie, remove this connector. It’s soldered on to an irremovable header on the other side, so this is your best option. Notice the black goo on the left. You may need to liberate the connector by cutting through that goo with an exacto knife before you can safely pull it out. Don’t force it and risk breaking a connection.
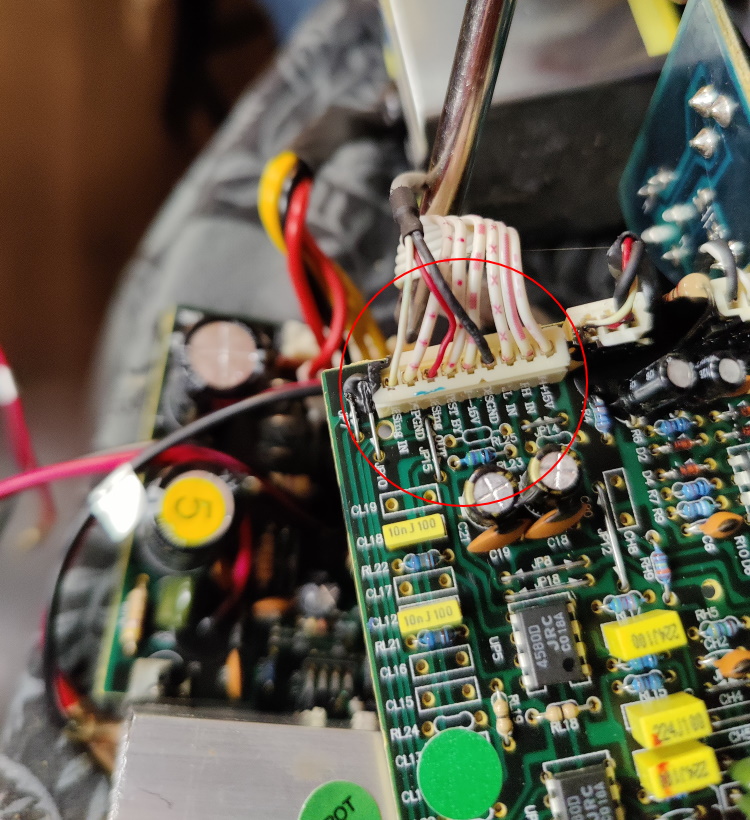
Three further screws need to be removed from the rear panel as marked below in order to separate the lower board for cleaning and repair.
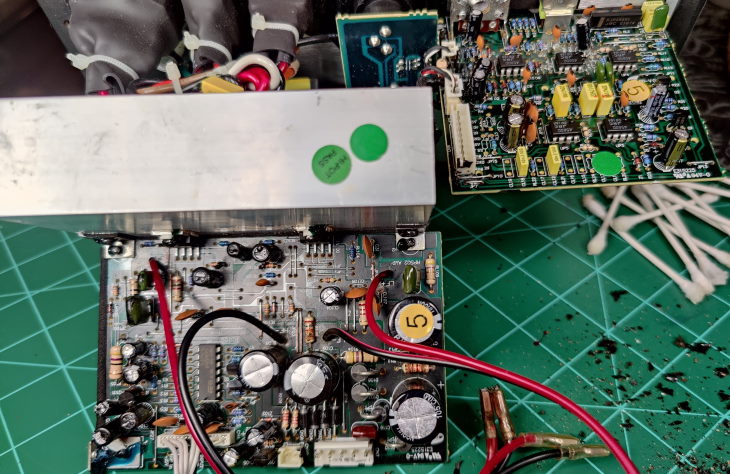
Here it is. The mysterious black goo problem. This potting material has gone off around these components, right next to some capacitors, and around the leads that head to the speakers themselves. The visible bubbles are actually wet. I put a multimeter on it, and it is conductive. Neato! You can also plainly see the corrosion on some of the bars and components. Circled are various places where the goo has been globbed on. Believe it or not, this isn’t as bad as the first monitor I opened up, nor as bad as most examples I’ve seen on the Internet when I was researching what might be wrong with these.
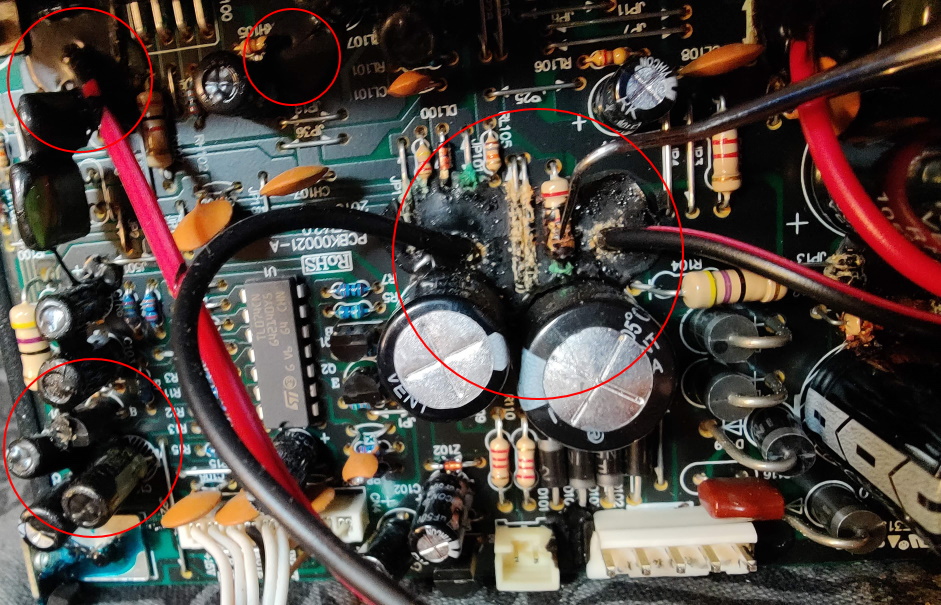
Yet more corrosion on this poor resistor.
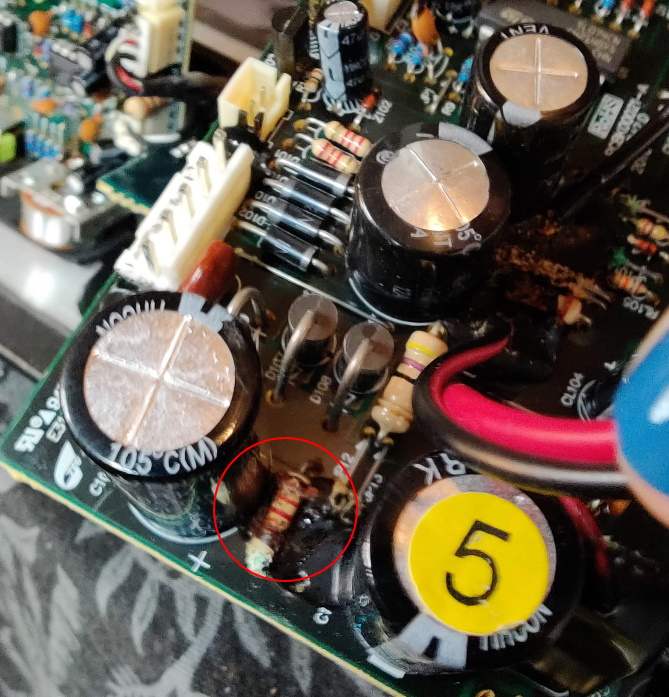
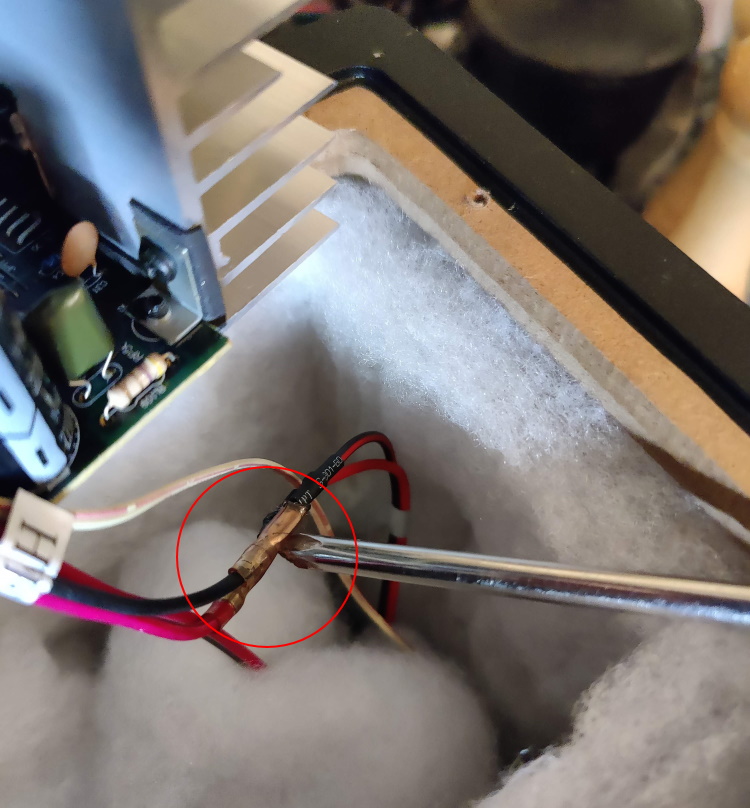
Their is even some potting material on the smaller board. Visually, it doesn’t appear to have bubbled and gone off, but it was still barely conductive. I’m not chancing it.
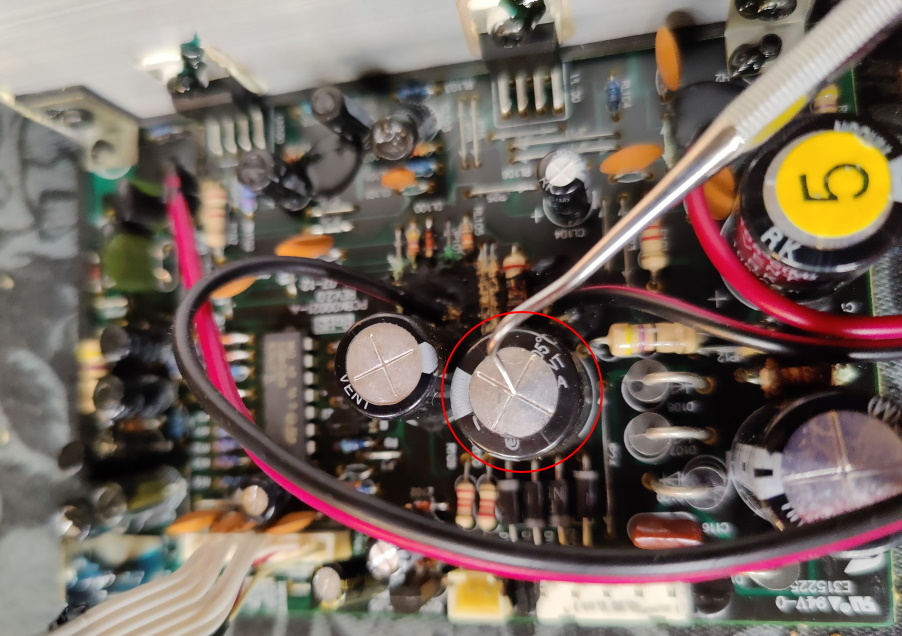
It’s visually hard to see in this picture, but this capacitor is bulging just like on the other monitor I dissected. Running a finger over it makes it very obvious how not flat it is in comparison to every other cap on the board.
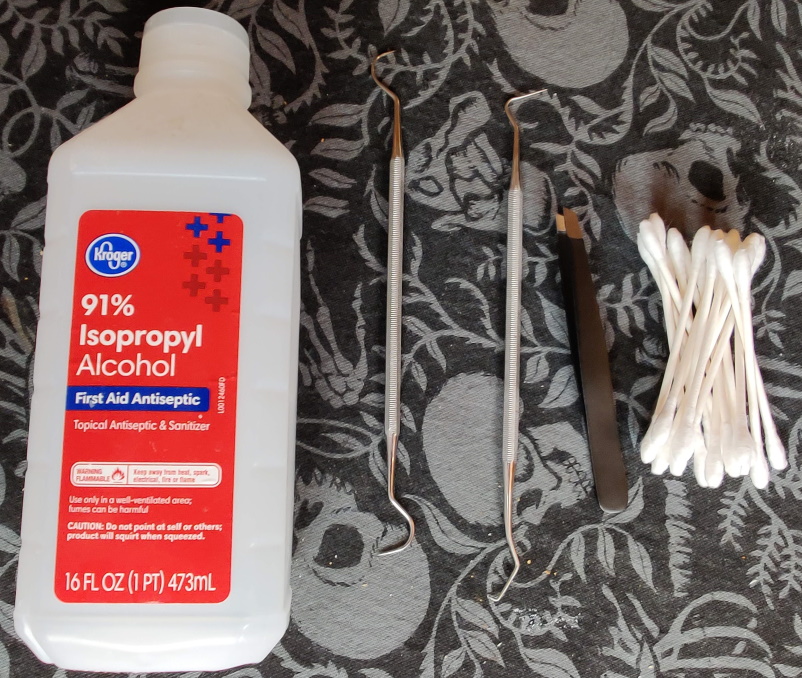
Dental picks, some decent tweezers, alcohol, and swabs will be my weapon of choice to pick, pull, and wipe away the black gunk and corrosion on this board. This part is going to take a while. Be patient. It’s also going to make a mess, and this stuff is sticky. You might want to put something down to catch all the little bits that are about to go flying.
That’s as clean as it’s going to get!
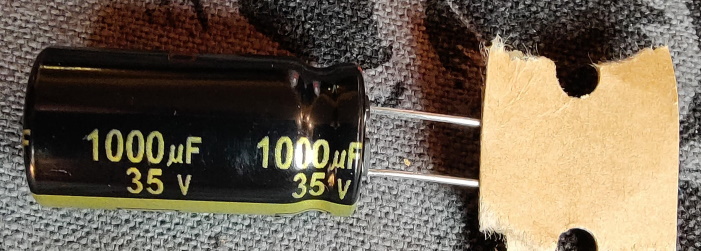
Time to replace the cap. I chose this beauty.
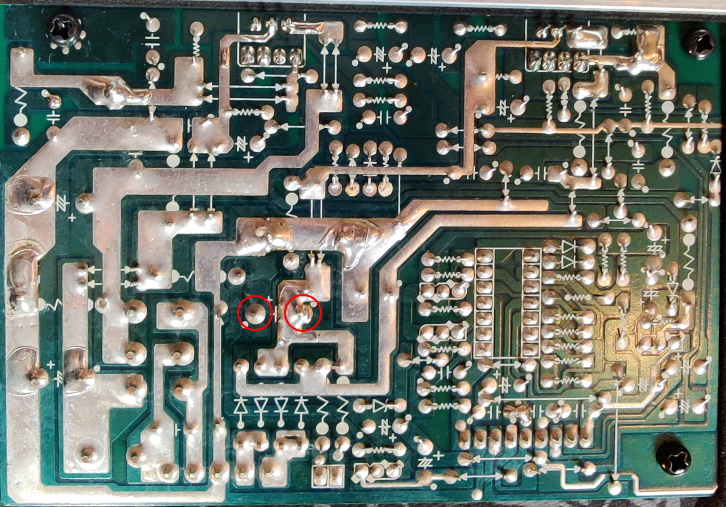
These are the points you need to desolder. Luckily this is super easy through board soldering, so if you have to muddle through with the worst soldering ever, you can probably still make this repair. I have a variable temp Lonove brand iron which worked just fine. Do mind the orientation of the new capacitor when you solder it in.
Our new cap is the odd one out, but this component is going to make all the difference. If you’re screaming at me in your head because it’s best practice to replace all of the caps when you rehab an amp, you’re not wrong, but this is going to be good enough. I reversed the order of the disassembly. They powered on, and the hiss, and loss of volume has been fixed. The balance is much better with my previously repaired monitor, and with any luck I headed off total failure from this truly awful black gunk.
Tags: hardware, electronics, audio